
If you’re new here, you may not know that my children have approximately 1000 food allergies between them. That means a lot of pre-made foods are, sadly, off-limits to us, and I am forced to make food from scratch like some sort of CAVE WOMAN. It’s as dreadful as it sounds, really.
Recently we made the very tough decision to eliminate all pre-packaged buns from our house. They are “may contain” products for several of our allergens – eggs, sesame, milk. For many allergy families, “may contain” is an automatic off-limits, but we have so few options available to us, it’s more of a “try it and see what happens” kind of strategy. Unfortunately, the bun situation hasn’t worked out too well lately.
And that means…it’s making your own hot dog bun time! I know. Why make your own when you can pick up a pack for less than $2 at the grocery store? Other than safety, there’s also the fact that these don’t split or fall apart when you slit them open, they don’t turn to mush when ketchup is applied, and they are pretty darn delicious. These are a hearty, chewy bun that would go really well with a big fat BBQ sausage. Mmmm. Masterchef Canada, here I come!
Egg-free Milk-free Bread Machine Hot Dog Buns
1 1/4 cup warm water
1 Tablespoon sugar
1 Tablespoon canola oil
1 1/4 teaspoon salt
3 1/2 cup flour
1 1/4 teaspoon bread machine yeast
Put the above ingredients in your bread maker the way your machine likes it. Mine is pushing 20 years old, and likes it added in the order listed above, with the yeast on top of the flour and separated from the liquid. I think newer machines want you to mix the yeast and water, though. I leave it in your hands.
Set the bread maker on the dough setting, and let it do its thing. Mine takes two hours on the dough setting to produce a nice, soft lump of dough.
Spill out the dough onto a floured surface; knead in a little flour if it is too sticky. Divide the dough into 8 equal pieces.
Press each piece with your fingers into a rectangle, around 5×4 inches. Roll up on the long side, like a jelly roll. Put the seam on the bottom and roll back and forth a couple of times to seal. Tuck the ends under – this creates tension across the top for a nice smooth look. Slightly flatten the tube with your hand.
Put the tubes on a parchment-lined cookie sheet, a few inches apart, like so:
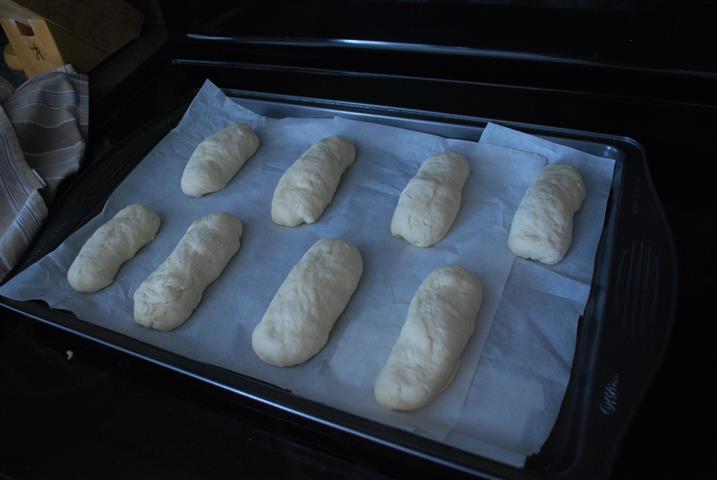
Brush them with a little canola oil, cover with a tea towel, and let rise for 45 minutes. At about the half hour mark, preheat the oven to 350.
If you’re not allergic to oh, EVERYTHING, at this point you can brush with a little extra oil and sprinkle on sesame seeds or poppy seeds. Or go crazy, and add both!
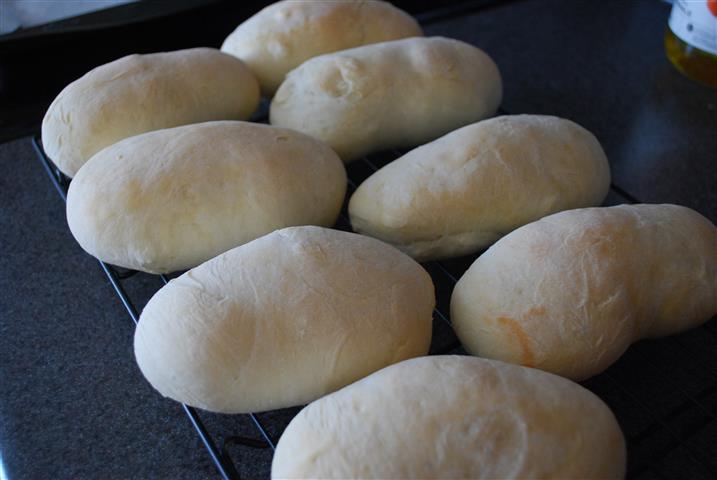
Bake at 350 for around 20 minutes – buns should sound hollow when tapped at the bottom. Remove to a cooling rack immediately so they don’t get soggy.
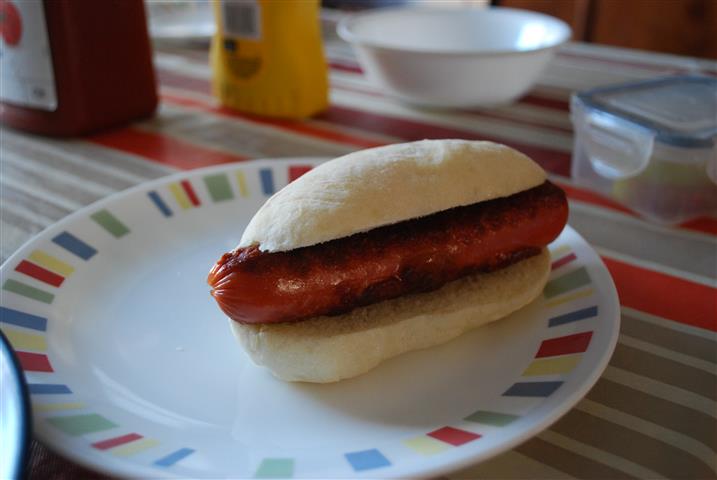
Once cool, slice them down the side and pop in a hot dog – enjoy!

Very impressive!
Man, that looks yummy! We’ve only made bread and pizza dough in our bread maker, but maybe it’s time to try something new! I love how you can make bread and dough etc. with only 5 or 6 ingredients rather than the multitude of sometimes questionable ingredients in store bought stuff.
Agreed. I often tell the kids that their food allergies had a silver lining, in that it made me much more aware of what we were eating, and made us all eat healthier as a family. Much as it pains me to admit it, we’re actually better off.
This looks good enough to make even though we don’t have allergies, or a bread machine…
Have you ever tried the President’s Choice flat hotdog buns? I can’t recall all their ingredients off the top of my head, but it may be worth looking into. They look like pitas but are pre-folded. My kids actually like sandwiches in those buns too.
these we use for burgers: http://www.goodguide.com/products/372019-pc-blue-menu-thins
these we use for hotdogs or sausages http://www.goodguide.com/products/372099-pc-thins-whole-grain
Hm, they look good! Will check the ingredients next time I’m at the Superstore.
We’ve gone “from scratch” on a lot of things, and I find it’s only intimidating until you try it. My latest is yogurt. I realize your family probably can’t eat yogurt, but for those who can, it’s easy, saves money, you know exactly what goes into it, and it’s delicious with maple syrup or jam mixed in. Then again, the jam has to be homemade, so that’s another job …
Man, that *does* sound intimidating! I’ll have to poke around at recipes. The kids can’t have it but Sir Monkeypants eats a ton of yogurt, so it might be worth it for us.
I bought a yogurt maker – this one, http://amzn.to/1aBGyzj, to be exact. I used to buy at least three large tubs of yogurt each week, so the cost got paid back pretty quickly.
“Making” the yogurt is really just being in the kitchen and watching the temperature of the milk. If you’re anything like me, there are lots of times every day when you’re in the kitchen long enough to do this. Or, it’s a good kid-helping activity – they can tell you when the milk hits the magic temperature.
Then it’s just into the machine for eight hours and into the fridge. The only costs are the 2L of milk each time you make a batch, and the yogurt you need to “start” a batch. One large tub of plain yogurt will start three batches – so that’s 6L of yogurt from one large store-bought tub.
My friend doesn’t use a yogurt-maker but her oven has a “proofing” setting – apparently that works fine. I don’t have that setting, and I find the maker really easy, so, you see, it’s really not that hard!
It is hard sometimes, I agree completely!
But as you said the silver lining is that we as allergy families are ahead of the curve when it comes to healthy, clean eating! ( it will be the stress and anxiety that will get us first!!!!)
Awesome job on the buns….I am inspired
those look really good. Now you have me wanting a bread maker and a yogurt maker (thank you Tudor) 🙂