
It’s been forever since I did any crafting around here, because I’m way too busy freaking out over the state of the now-revealed lawn. Why, oh why, did I ever wish for spring, when I had all that lovely winter snow covering up the grub-infested carpet of weeds that is our so-called lawn? I am seriously considering astroturf.
Anyway! A couple of days ago, I did find time to do a craft, mostly at the Little Miss’ insistence. So that means blog! fodder!
We made magic wands, but not girly wands, the kind you can buy in the store with purple feathers and sparkles and ribbons. These are wands made for pure magic, the kind that would make Harry Potter proud. I actually first made one a few years ago, when the Captain was Harry Potter for Halloween. At the time, I also made one for Gal Smiley, and with the Captain’s new found love of all things Harry, they’ve been running around here with their wands yelling “Wingardium leviosa!” and “Expectro Patronum” and “Bringy Meith a Sandwichia!”
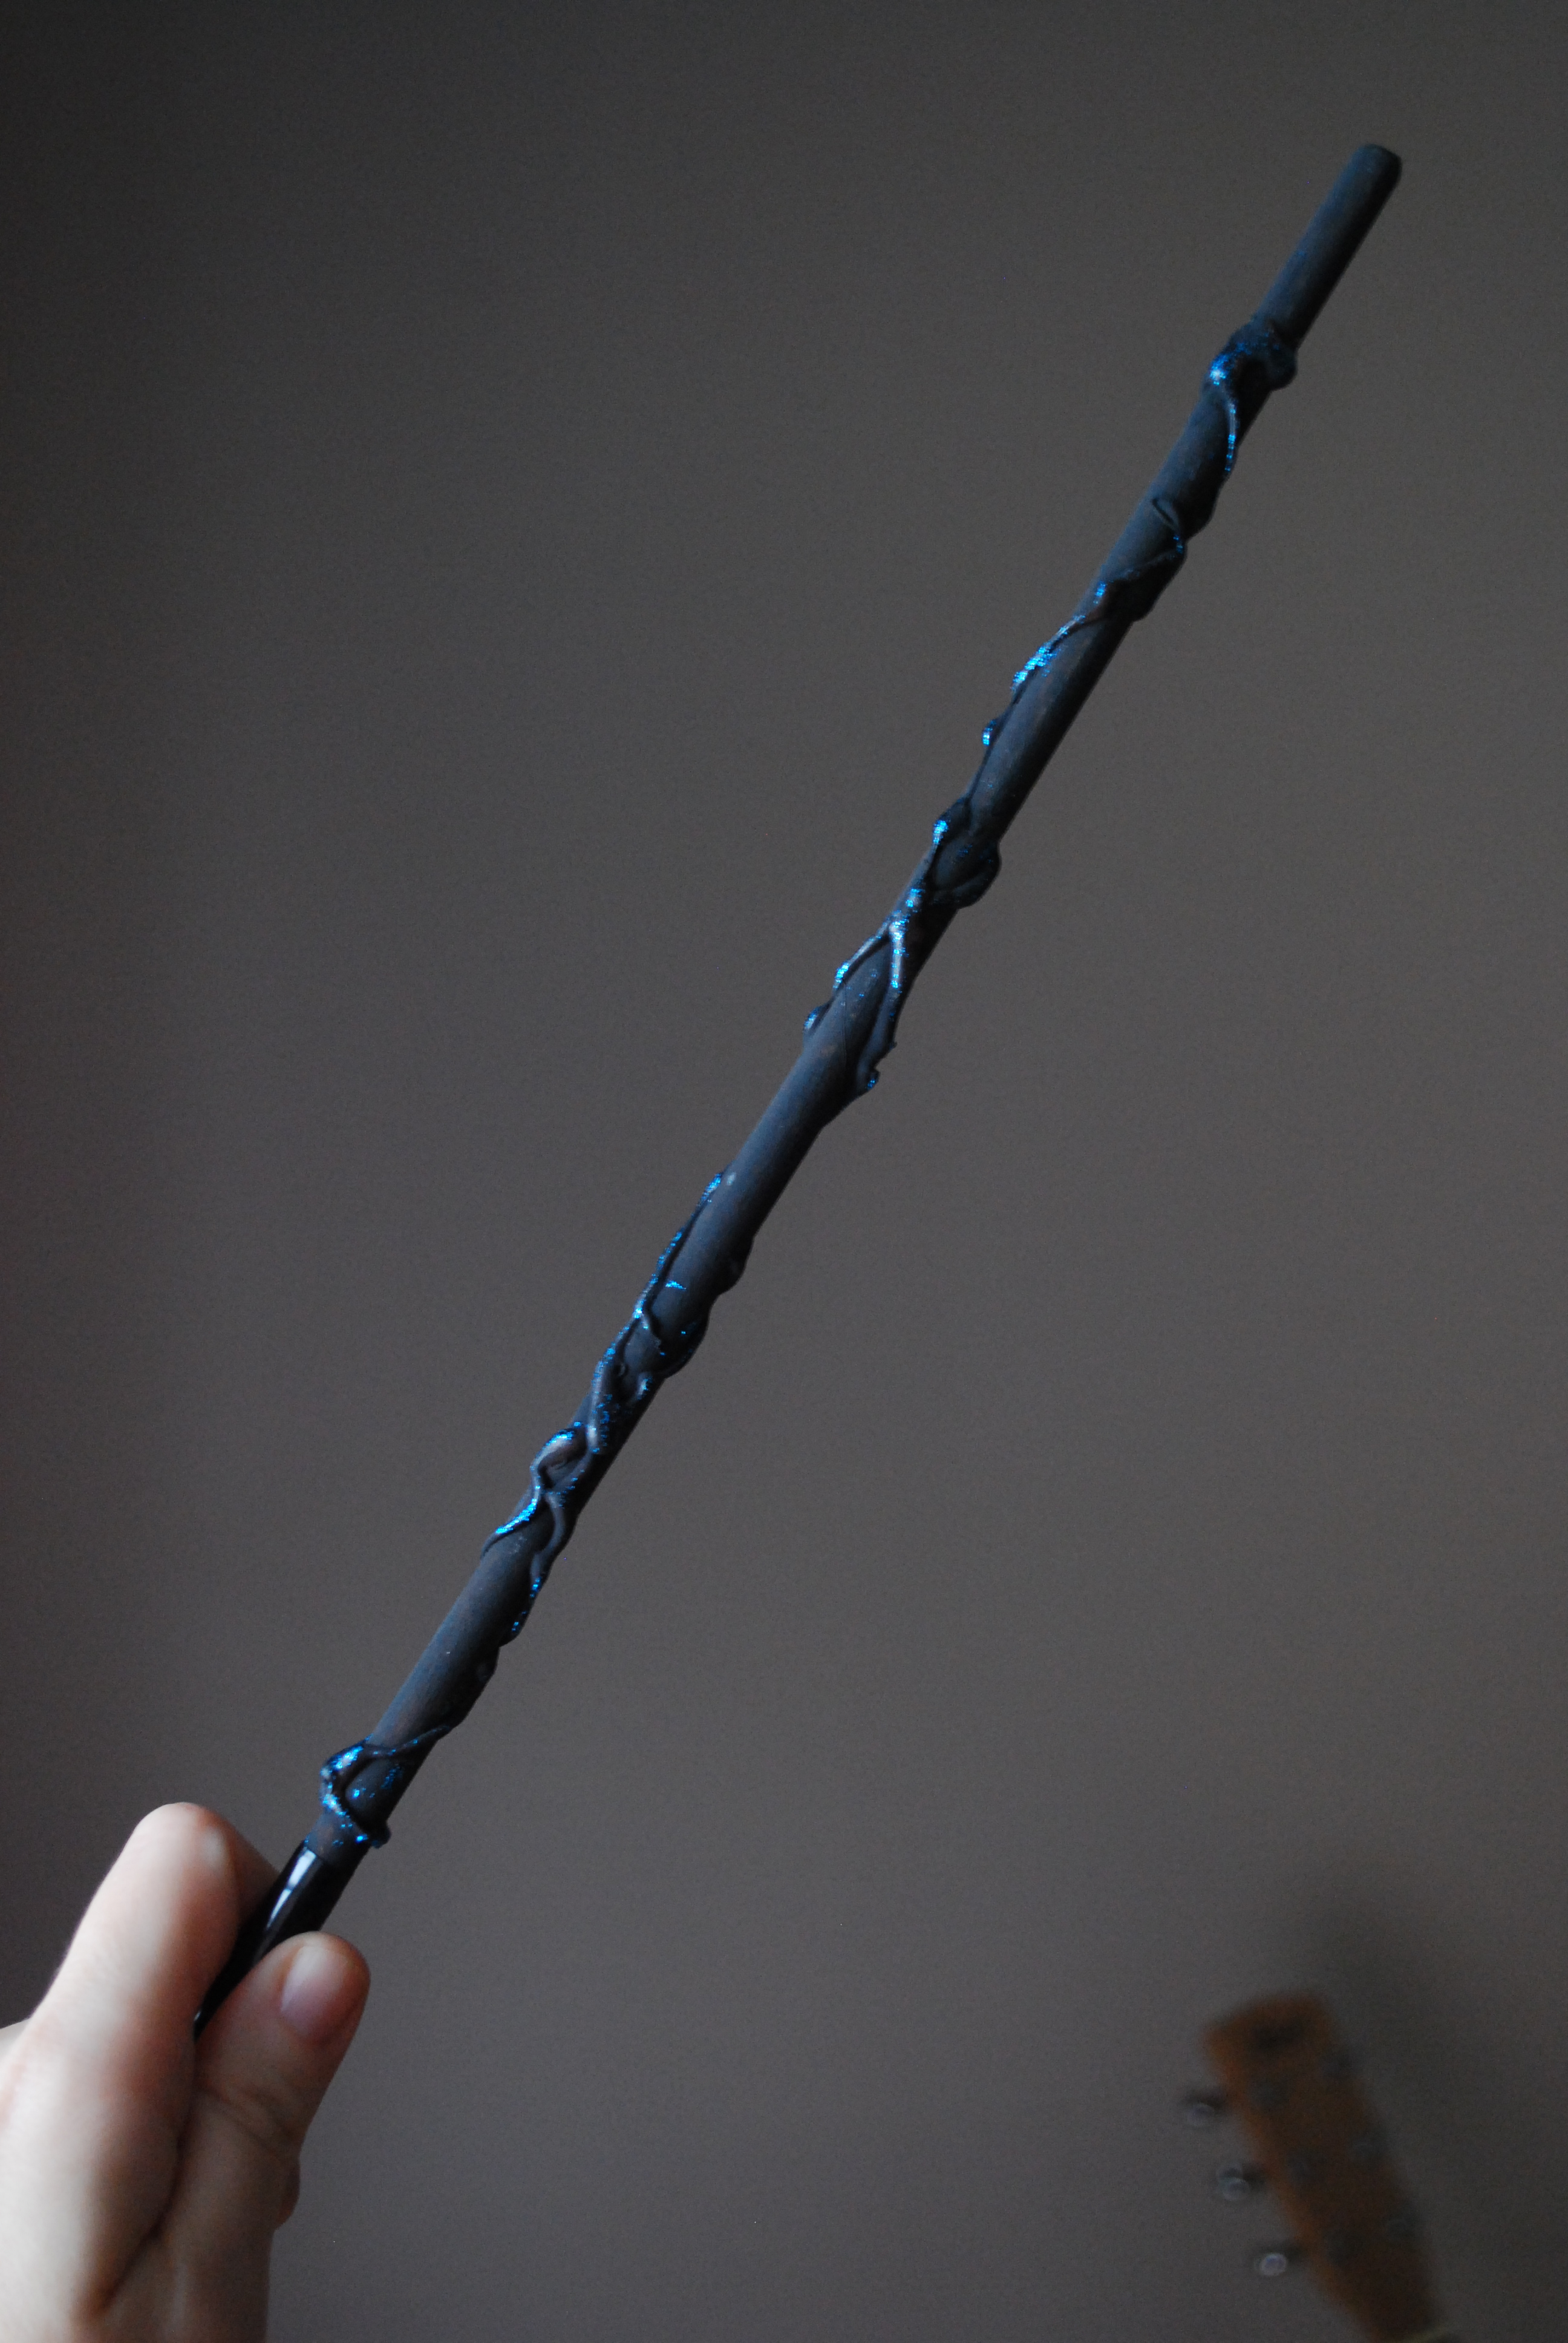
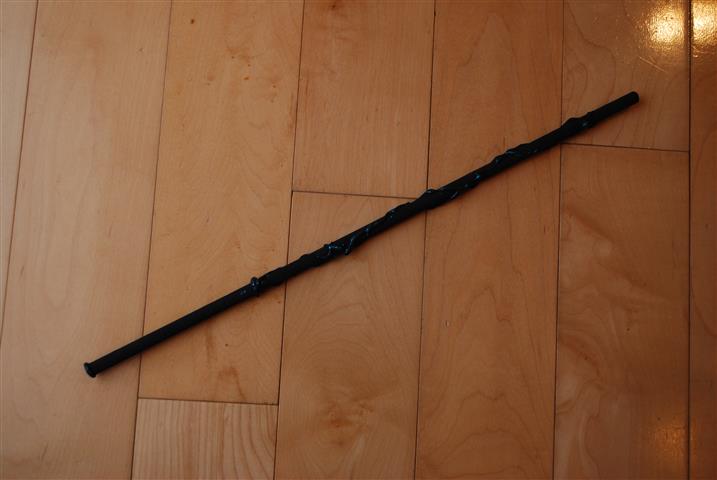
Here’s what one looks like (click to enlarge all images):
Sadly, Gal Smiley snapped hers in half last week (not all sad – she pretended to be Ron from book 2 most of the time), and poor Little Miss never had one in the first place. So it was time to get crafty with it. I am grooooovy, man.
Let’s craft!
First, you will need to gather:
- a piece of dowel – about 3/16 to 1/4 inch thick
- a glue gun
- a saw, or perhaps some scissors
- sandpaper
- black paint
- glitter glue
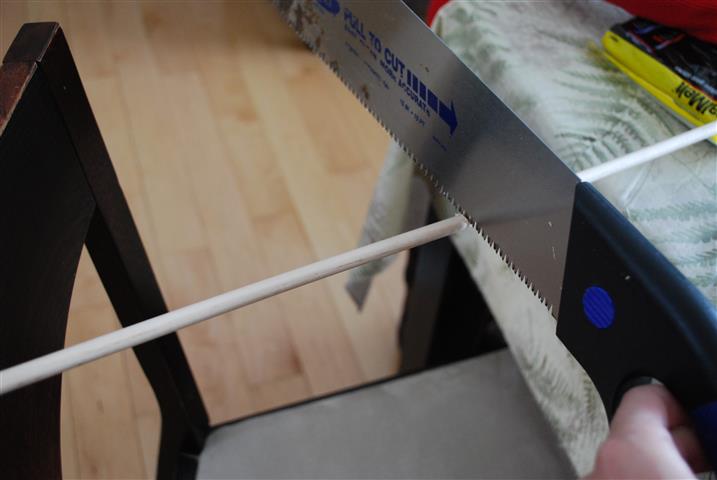
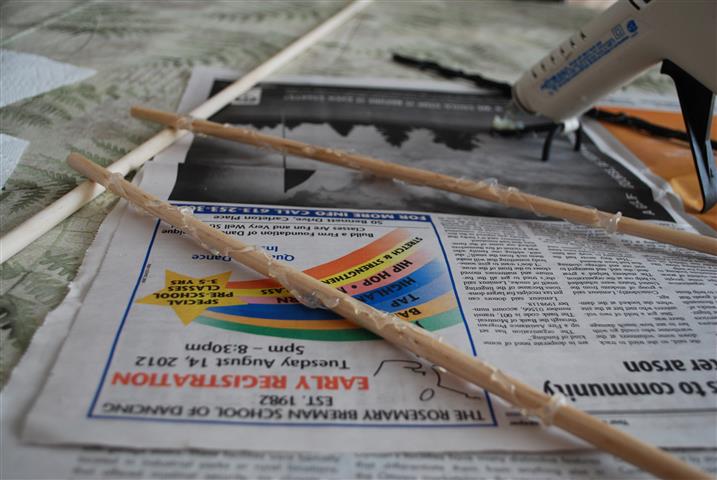
Now, take your piece of dowel and cut it to length. Somewhere around 10 to 14 inches is good, depending on the size of your kid. If your dowel is thin enough (thinner than 1/4 inch), you might be able to just snip it with a tough pair of scissors. If it’s a little thicker, it might take a few strokes with a hand saw to snap it.
The end will be all rough, so sand it down. You want one end flat, and the other end slightly rounded. If you were super creative and had a lot of time on your hands, you could taper the whole thing from base to tip, like the “real” wands used in the movies. But I’m lazy so I just filed off the sharp bits with some medium grain sandpaper.

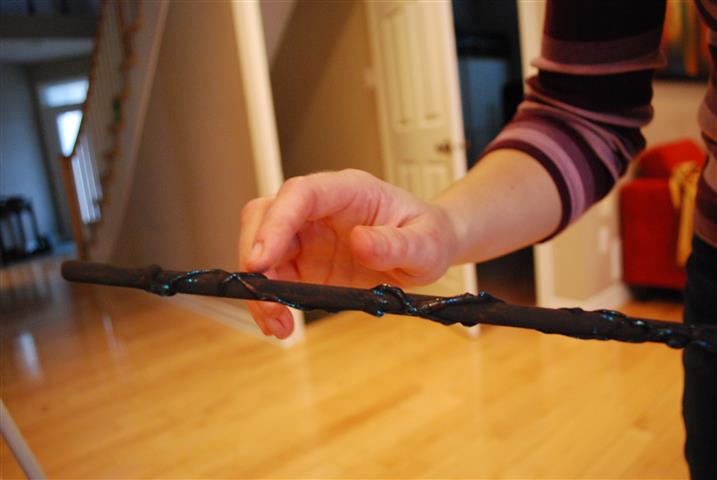
Now, heat up the glue gun. First, use the gun to put a ring of glue around the flat base. Then, put another ring about a hand’s width up the shaft. This forms the “handle” part of the wand.
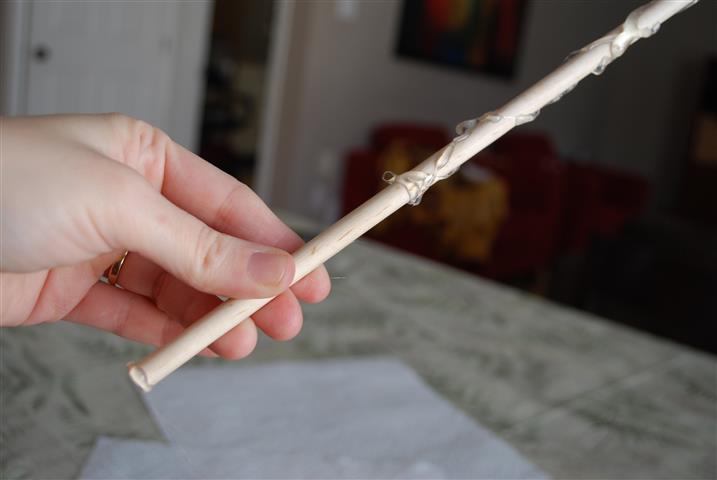
Then take the glue gun, and for shaft part above the handle, make a pretty pattern. What I do is spin the wand while applying the glue, then twirl around at the top and come back down, so it ends up making a criss-crossed pattern.
You’ll want to leave about an inch of bare wood at the tip to make it look good.
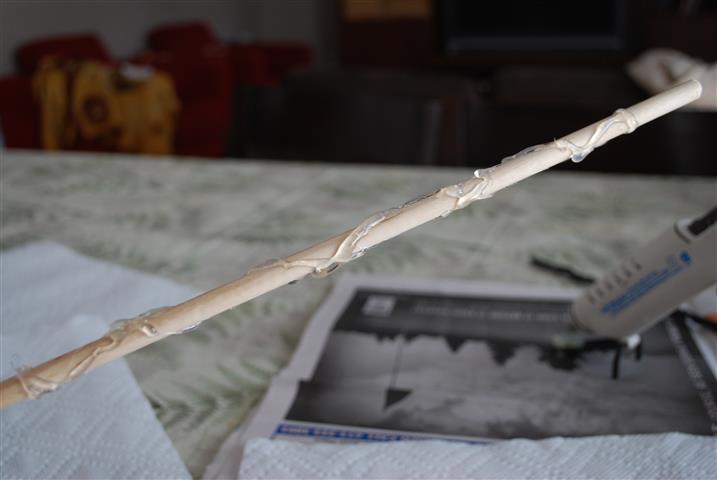
WARNING, this gluing part is pretty annoying. The glue gets everywhere and I’m not going to lie to you, there will be cursing. Luckily, we are going for an organic vines-growing kind of effect here, so don’t worry about making it smooth and even. Even slips and slops are okay. If you get some of those little thin stringy bits hanging off the sides like hairs, you can let them cool slightly and then snap them off with your fingers, or let them dry completely and cut them off with scissors.
In any case, once you have the glue on, use the tip to lean it against something and give it an hour or so to dry.
Once the glue is dry, it’s time to paint it. Previously, I always made the wands black, but the Little Miss asked for purple, so I tried to mix up the most dark, badass purple I could, and used that on hers. Last time I made these, I used a satin finish black wall paint I had kicking around from another project. This time, I just used Crayola craft paint. Both worked well, but the satin finish paint made for a cooler looking wand and also a nice, smooth feeling to the handle part, and the kids definitely prefer that. So if you have access to glossy paint, I’d recommend that; otherwise, just use craft paint and they’ll never know the difference.
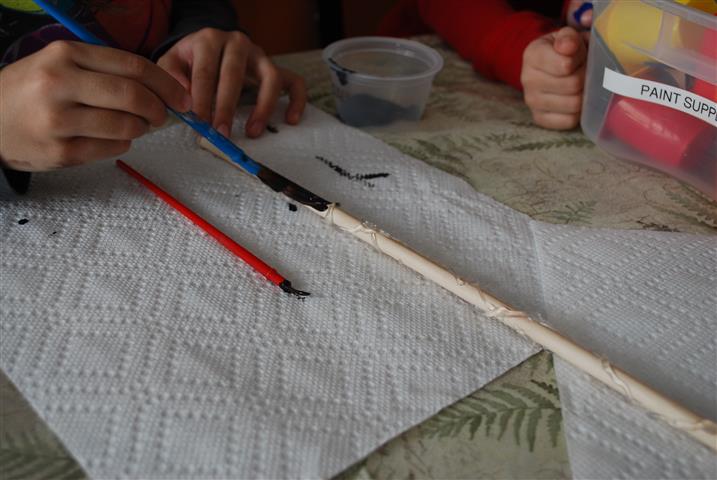
You want to paint all over everything, including the glue. Really lay it on there thick; you might need to come back in half an hour and put on a second coat. Also you’ll have to come back to touch up the spots where it was resting as it dried.
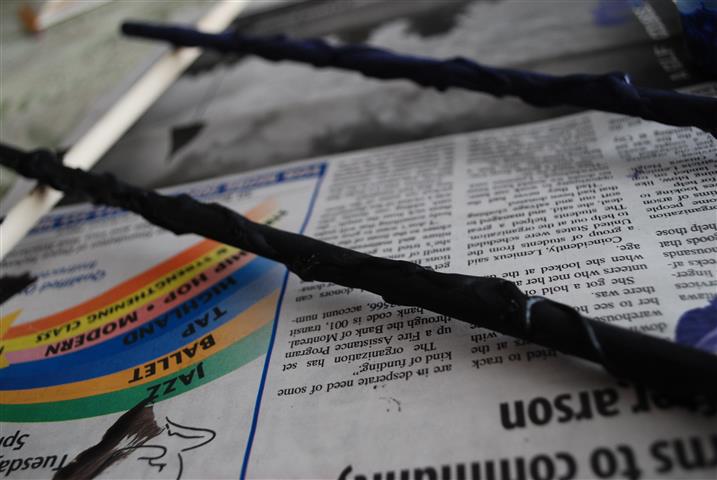
Here’s a shot of them once all the paint is dry.
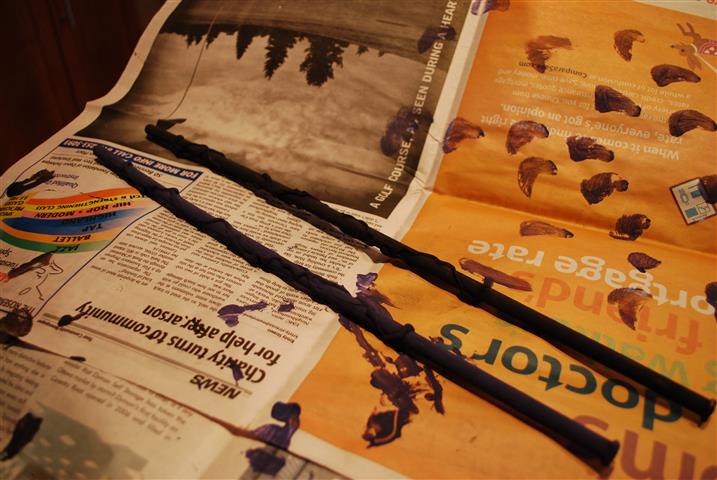
Time for the last step! Get some glitter glue – here the kids customized their wands by choosing their own colour of glue, and apparently various colours represent various magic and Reducto and blah blah. Squeeze a puddle of glitter glue onto a bit of newspaper. Dip your finger in the glittler glue and rub it on just the glue-gun-design parts of the wand, to highlight them.
Give the glitter a few minutes to dry, and voila! AVADA KADAVRA.
Or whatever.

we just had an epic Hary Potter party at our house in February. this is a great craft 🙂
if you ever do a HP Party, let me know…. i have many ideas!
Oooh…that is a great idea. Unfortunately the Captain just had his birthday in March, so we’re almost a whole year away from HP party potential – but I will keep it in mind and come begging for help if we do it next year!
we actuallly had a HP Party just for FUN, not even a b’day! crazy, i know but we all love HP and wanted to do something fun with it! just with “the cousins”. it was awesome!
This is an amazing idea!!
On the subject of your lawn woes…I might have a natural solution. We also have a grub infested lawn. So do all the neighbours, so unless the whole neighbourhood treats for grubs, they aren’t going anywhere. We decided to invest in some clover for our lawn. Apparently, if it’s mixed in with the grass, the grubs don’t cause as much damage. I read one website that says clover is actually toxic to grubs so they stay away from lawns with clover mixed in. Other people who left comments on gardening forums about the subject have gone with an entirely clover lawn.
We planted quite a bit last year and we’re happy with it! The grubs don’t eat it, we still had green patches on our lawn longer than everyone else last summer (very drought resistant plants) and we’ll be adding more seed when we’re convinced that winter really IS over!!
I am super interested in this idea. If it works, great, and even if not, I love clover and the soft feel of it beneath your feet.
Did you get any special variety? I have heard there are non-flowering varieties – do you know what kind you used?
And did you just sprinkle the seeds over your lawn, or did you top-dress first? Did you have to water to help it “take”?
Totally doing this.
Very cool. Somewhere along the line my boys have picked up an official trademarked Harry Potter wand (most likely scenario: the thrift store or some other discount store since I’m awfully cheap) and it looks a lot like your version. Well done.