
The Captain was away at Scout camp this past weekend. He left on Friday around dinnertime.
Thursday, after school, while packing: “By the way, Mom, I need to have a costume for camp.”
Like, what kind of costume? Something we already have in the basement, fingers crossed?
“It’s a movie theme and we are the concession stand and we have to dress like food.”
Sigh.
Thursday evening we had an end-of-year Brownies party coinciding with a soccer game and so it was all up to Friday. I set aside all planned work to make a Can of Coke costume. Kid – YOU OWE ME.
So of course I thought I’d blog it up here, because what is the use of frantically throwing together a last minute costume if you can’t document the process for the world? If a costume is made and we don’t blog about it, did it even happen? I think not.
You will need:
* two small hula hoops – I found small ones at the Dollar Store
* some foam board – the thicker the better
* duct tape
* fabric for the background – red, for a can of Coke – about 1 m of 150cm wide stuff, something sturdy but not too heavy, preferably on sale
* felt for the writing/image
* white glue
* a large container of jellybeans and an enormous pot of tea
So first, measure your kid and then do a whole bunch of math to figure out how big to make everything. You’ll want the hoops to be about as wide, in diameter, as their shoulders, plus a couple of inches. For my kid, this was 16 inches (don’t worry if your hoops are bigger than this, we will be cutting them to size). For length, you want the distance from their shoulder to about mid-calf – for my kid this was 31 inches.
(Sorry for the imperial – I always go imperial when sewing and crafting.)
Next, cut two panels of the red fabric, one for the front and one for the back. Get a calculator, because you’ll need it, and have tea handy for fortification.
The width of the panels is the circumference of the hoops, divided in half, plus 1 1/4 inches for seam allowances. So for my kid, this was (3.14 * 16 / 2) + 1.25, which is about 26 1/2 inches (rounded up a bit, this isn’t rocket science).
The length of the panels is the height you measured plus 7 inches for seam allowances, so in my case, 38 inches.
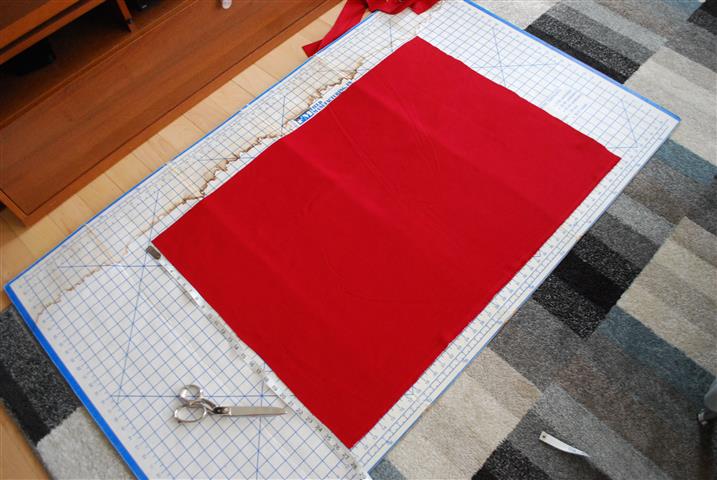
Once the panels are cut, choose one to be the front and put the design on it, making sure to leave at least 3 1/2 inches at each end, which will become the tubes for the hoops.
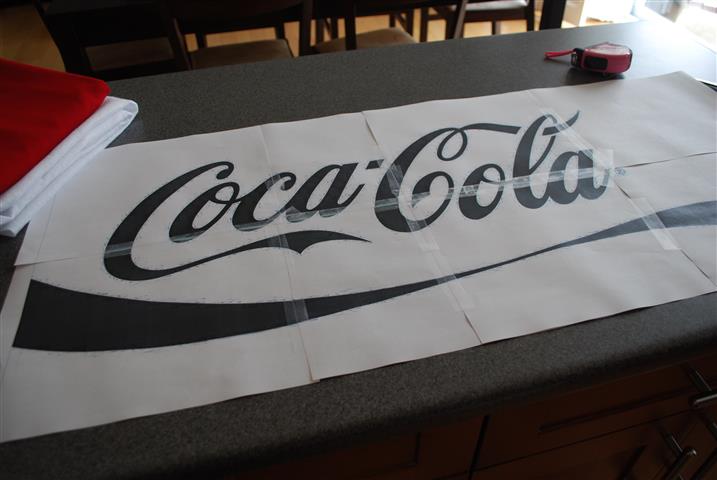
To create the design, I grabbed the biggest logo I could find online and inserted it into a Word document, then printed it out in Poster Size (my printer can do this – take a one-sheet and print it huge, across four sheets). It turned out that even this was not big enough, so I ended up splitting the logo in half (using a graphics program) and poster-size-printing each half, then piecing it all together like a puzzle.
Have another cup of tea before your brain starts hurting.
Now pin the logo pattern onto some white felt and cut out the pieces.
(Ha! Ha! Ha! It sounds so simple when you write it out in a single line like that! In reality I was pinning and cutting, with very tiny scissors, for like an hour and a half. GAH.)

Here I will mention that we got the whole idea for this costume from this link over here, and they painted on the logo with fabric paint instead of using felt, but it took a long time and I was on the clock. I figured felt would be faster, and I’m sure it was, but maybe more annoying. Your call.
Finally, lay out the letters on the fabric.
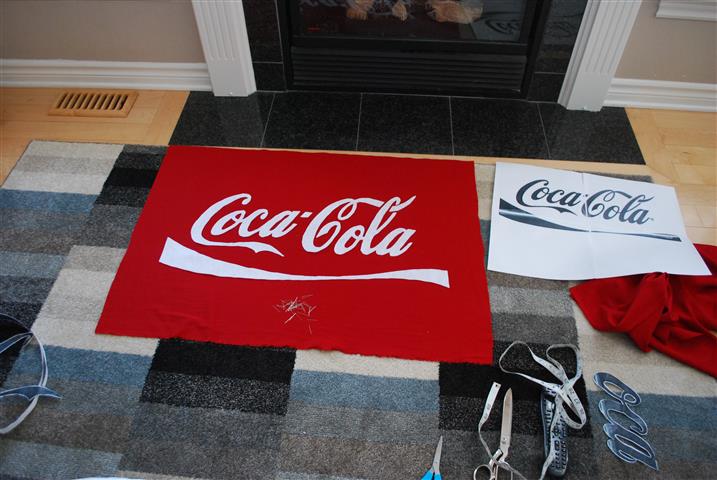
I had originally planned to lovingly sew them on by hand but by now I had less than an hour until school ended, so after some tests on some scraps I said SCREW IT, and glued it on with white school glue. Seemed to work just fine.
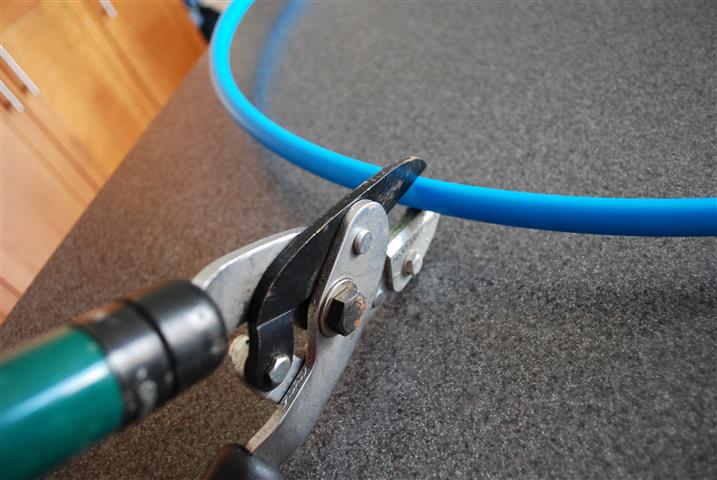
While the glue is drying, it’s time to prep the hoops. Peel off the stickers hiding the join, and use pliers to pull out the staple holding it all together:
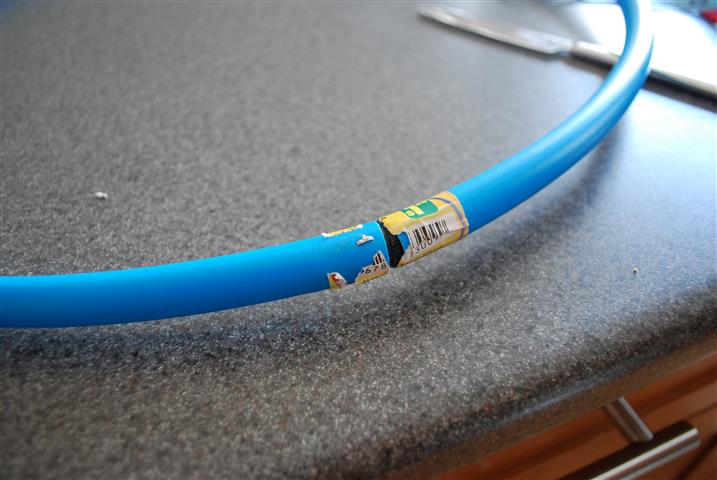

(It’s very tricky to take a photo with your left hand while using pliers with your right hand. How do left handed people ever take pictures?)
Then pop the hoop open and measure it carefully to determine how long you’ll need it to be. Mine, remember, needed to be 16 inches in diameter which means about 50 1/2 inches in total length around the outer edge of the ring. My rings were 20 inch hoops, so (more math) I needed to cut about 15 inches off of it, so I measured that out and marked it with a pen and then clipped it with my garden shears:
Aside: those garden shears were a gift from my mother many years ago and they are seriously the most useful tool we own. Those suckers will cut through ANYTHING.
Second aside: I always wondered what they put inside hula hoops to give them that shaky-shaky noise. When I was a kid I imagined it was jewels, or jellybeans, or sparkle sand. Turns out it’s just a bunch of little pebbles:
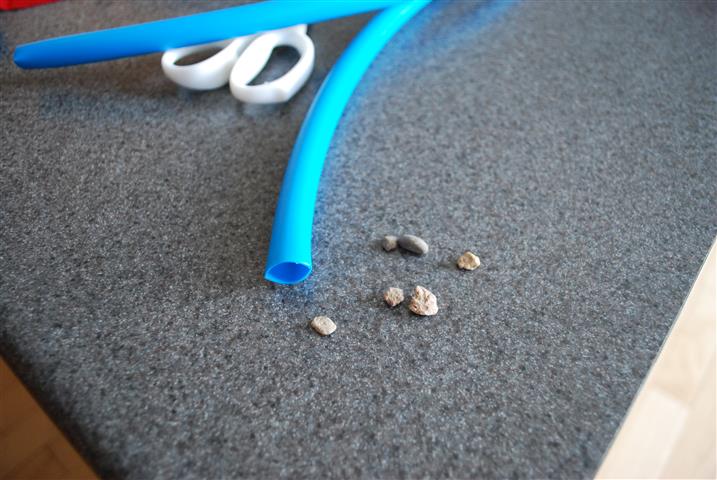
So I ate a whole bowl of leftover jellybeans from Valentine’s Day to ease the disappointment.
Third aside: the leftover bits of the hula hoop are now the most coveted toy in our household. FIGURES.
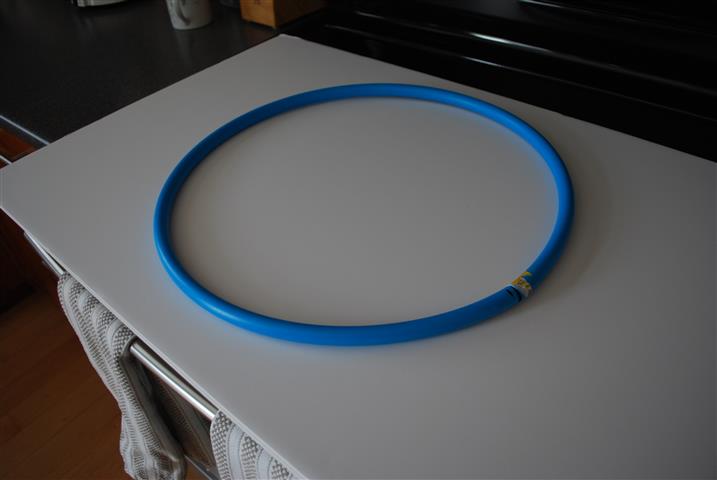
Onward! Now that you’ve got two hoops cut to size, trace one of them onto your foam board, and use a box cutter to cut out the circle.
Here’s where the awesome photo essay part of this post breaks down, by the way. From this point on, I had to stop working and go pick up the kids from school. Then, I realized I still hadn’t packed the Captain’s food bin (he has to bring all his own food because UGH, allergies) and we were short of the kind of cookies he likes, so I continued working on the costume while baking cookies AND packing food, and so you can imagine, photos fell by the wayside. Also, Sir Monkeypants came home early (THANK GOD) and took over the making of the top part, and he ROCKED it, but is not that into Pinterest so yeah, no pics.
Here’s how you wrap things up, though:
- Find a tupperware container or pie plate or something else round that is about the size of your kid’s head (don’t forget to leave ear-clearing room), and trace it into the centre of the foam board circle, and cut it out too. Don’t make your hole too big, as it lets the costume slide around too much and they look like a can of Coke from back in the days when it was called “coke” for a reason, if you know what I’m saying.
- Cover the whole ring of foam board with strips of silver or grey duct tape to make the top of the can.
- For the tube part, first put the front and back fabric rectangles together, right sides facing, and sew down the side seams. Remember to leave a hole in each seam for the arms to come out. I sewed about 5 1/2 inches from the top, then left a hole of about 9 inches, then sewed the rest of the way down.
- Press those seams out, and where the arm hole is, top stitch around to hold the seam allowance back.
- At the top and bottom, roll over 1/2 inch and press all the way around; then roll over 1 1/2 inches and press. This creates a pocket for the hoops. Sew each pocket all the way around with top stitching.
- If you forgot to leave a hole for the hoops to be inserted, no one here is going to judge you, NO REASON, just rip open a couple of inches somewhere.
- Thread each hoop through its little pocket, then snap them back together with the snapper thing. I meant to secure them with a bit of tape before sewing up the pocket opening but I forgot. But you could do that, and it would be a good idea. Then sew the pocket holes shut by hand.
- Last step! Attach the top to the base. I admit here: I had no idea how the heck to do this. We ended up taping the top to the base underneath with more duct tape. Duct tape fixes ALL.
And that is it! Results:

I was pretty freakin’ proud of myself, let me tell you.
Sunday, upon return from camp:
How was your costume?
“It was overkill. Most other boys just had a plain t-shirt with the name of some candy written on a piece of paper and stuck to it.”
FIGURES. Guess what you’re being for Halloween, kid.

holy crap! that’s flippin’ awesome!!
You are both brilliant and insane. And that’s why I like you so much 🙂
Heck yeah he’s going as a can of Coke for Halloween! That’s a lot of work…and really awesome.
Will you be MY mom? 😉
So much AWESOME!!
I started reading and I went “no way… she didn’t…” 😆 I love it. That’s some (insert expletive) resourcefulness. You rock!
Additional comments: The last picture is priceless. Also, Coke rock (not a Pepsi fan). Finally, your floor looks spotless compared to mine.
I say this with love … you are NUTS!