
Time for a basement reno update! Things are progressing well, and we are very happy, although spending most of our weekends at the Home Depot picking out things, which has its own challenges. I’m sure the children will look back on this time period as The Years We Spent At Home Depot Not Playing Video Games, and it will long be lamented in song as an era of great sadness. (Hopefully after the bridge there will be a nice wrap-up verse about how the new basement home of the Wii made up for all of the sorrow. THERE HAD BETTER BE.)
Anyway! The drywall is up and mostly mudded, and all the rough work for the electrical is in, so thought I’d share some photos and also chat some about what we’ll be using the space for. Since we’ve been thinking about finishing the basement for quite some time, we gave a lot of thought into what we wanted to do with the basement, and how that was all going to work out. All that pre-thought was DEFINITELY worth it, especially if you are not hiring a big design firm who will swoop in and make all the decisions for you, but rather, a totally cool and reasonable guy who will give you what you want, at your own direction (recommended!).
Here’s a refresher look at our basement map:
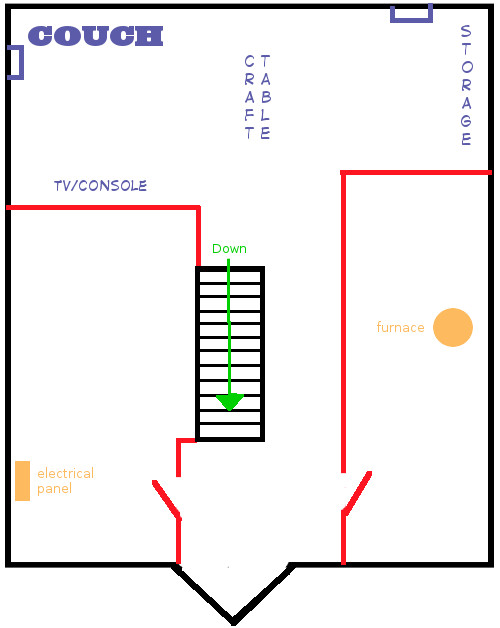
Let’s start with a look at the stairs. It’s been the hardest part of this project to manage, one of the biggest expenses, and probably the biggest pain in the butt. Here’s some before shots, above and below:
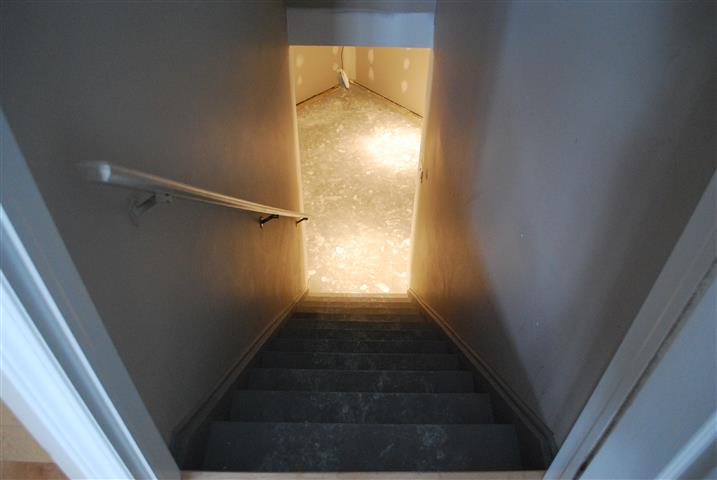

SO ugly, no? When we moved in, we paid to have the basement floor painted (to control dust and dirt – highly recommended for a newbuild home if you’re not going to be finishing the basement right away), and the builders used the grey basement concrete floor paint to paint the stairs, the sideboards, and the super cheapy railing. All dull, horrifying grey. Plus, the stairs themselves are made out of the cheapest of all chipboard, many of which were split or chipped during the original construction process. It’s not even paint-grade wood. SHUDDER.
We could have had the stairs completely replaced, and it would have been expensive, but worth it to us. We did not want to carpet the stairs because we have hardwood up on the main floor, and we’re doing laminate on the basement floor, so we thought having carpet just on the transitional stairs wouldn’t look good. Our guy has come up with a nice middle of the road solution, however – he is replacing the top parts of the stairs with maple treads, and staining them to match the laminate; then putting white MDF on the riser side. We’re replacing the handrail with stained maple too, and then painting the sideboards white. Hopefully it will be a magical transformation.
Here’s a shot of that weird triangle part of the basement landing:
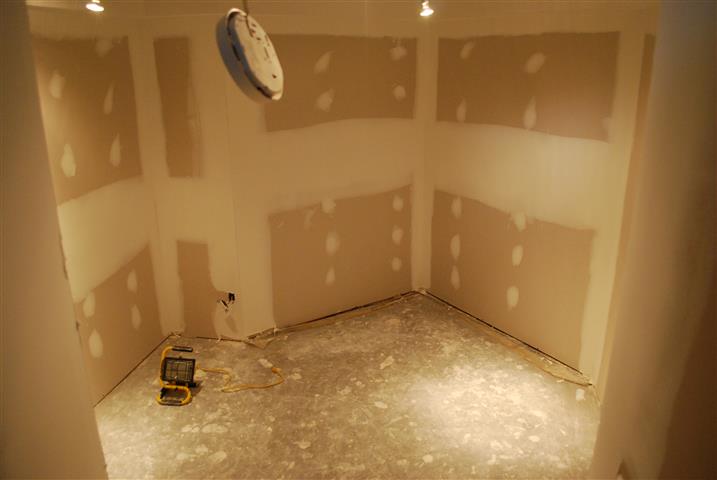
Lots of people who gave us quotes recommended walling this off completely to be nice and square. But I took some measurements and I THINK that a nice, L-shaped, floor-to-ceiling Billy bookcase from IKEA will fit in this space perfectly. This is our big strategy for dealing with all the books in this house, which currently are stuffed into just about every room. I’m hoping to do one side of the L for adult books, one side for kids’ books. We’ll see how it all turns out.
It was good to decide that in advance because we made sure to have a pot light put right in the triangle, to light the shelves, and also to make sure the bulkhead here (required for our central vac) was framed all around the V to make it look like it was meant to go there with the shelves.
I didn’t take a shot of the storage areas, but wanted to mention here that we plan to put a fridge in the storage room to the left. That was important during the electrical rough-in, because the fridge required its own circuit and they had to set that up for us. So if you’re thinking basement fridge, make sure you plan in advance exactly where you want it.
Here’s a pic of the hallway, under the stairs:
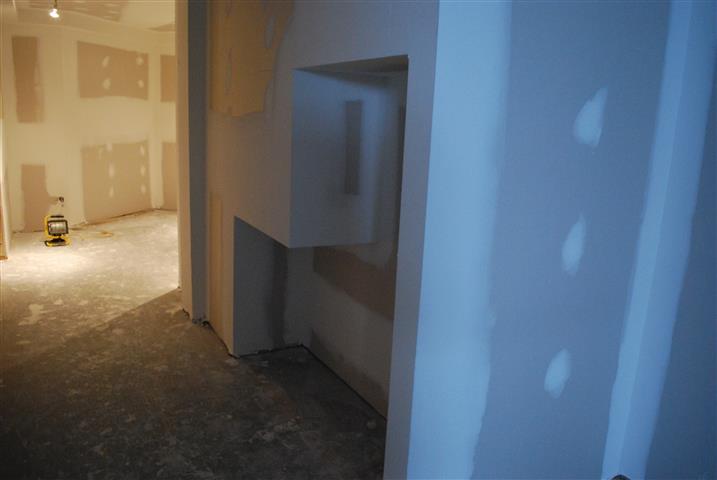
I pinned a lot, a LOT, of pictures of under-stairs-storage on Pinterest. But everything there was gorgeously expensive, and also, we weren’t sure we even needed it. It was our builder guy who suggested he just create this little drywall box under the stairs, that will perfectly fit a couple of Expidit shelving units from IKEA (one 2×8 in the tall part, one 4×4 in the short part). These are fully open shelves so we are planning on using them for decorative purposes – photos or art or maybe small stacks of artfully arranged hardcover books. That type of decorating is not my forte, however, so we’ll see. BRAINWAVE: maybe this is where I will put completed LEGO projects! One box per item, in a little display! THE BRAIN CHURNS.
Anyway, giving the hallway a little thought in advance helped our builder guy plot things out in terms of supply management, and also we added extra lighting to the hallway so these shelves would be visible. Fingers crossed it all comes together.
Now we’re into the big room. Here’s where the TV is going to go – couch on the back wall, TV under the bulkhead that hides our heating ducts:
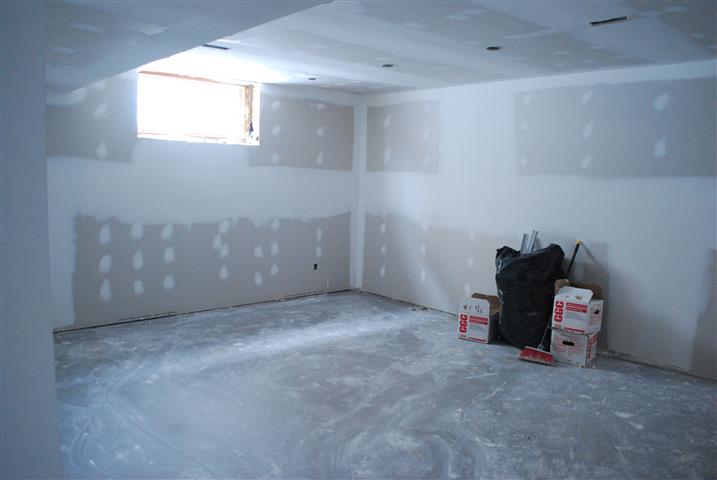
Here’s the other end of the room, which we plan to use for sewing and crafts, as well as a whole wall of wardrobe-style storage units across the far wall (from, you may have guessed it, IKEA):
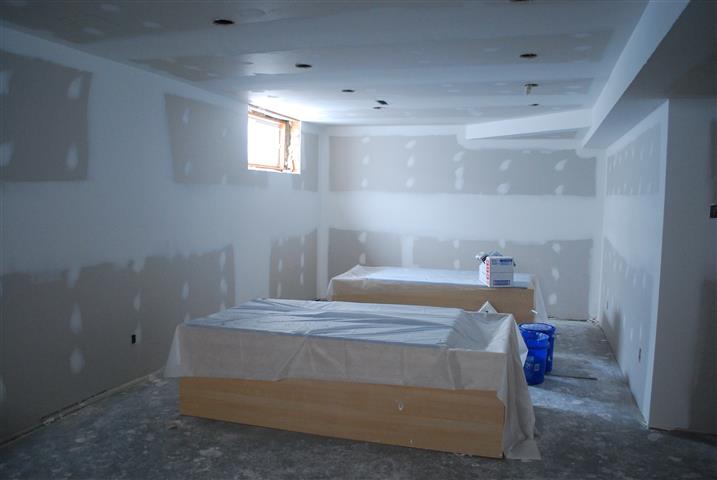
Since this is such a huge, open space, knowing our general plans for how we were going to use it was important, especially for deciding on where we wanted the outlets and lighting to be. Right now we have the TV area lights on one circuit, and the craft area lights on another circuit, and we ended up adding a few extra pot lights right over where the craft table and sewing table will be – definitely worth it, I think. Plus, we were able to make sure the bulkheads were tight enough to clear the wardrobes, and that we’d be able to fit three across (a tight fit, as our furnace is on the other side of the wall of the craft area, and needs a 3 foot clearance). I *think* we got everything we need in this space, but time will tell.
One last pic:
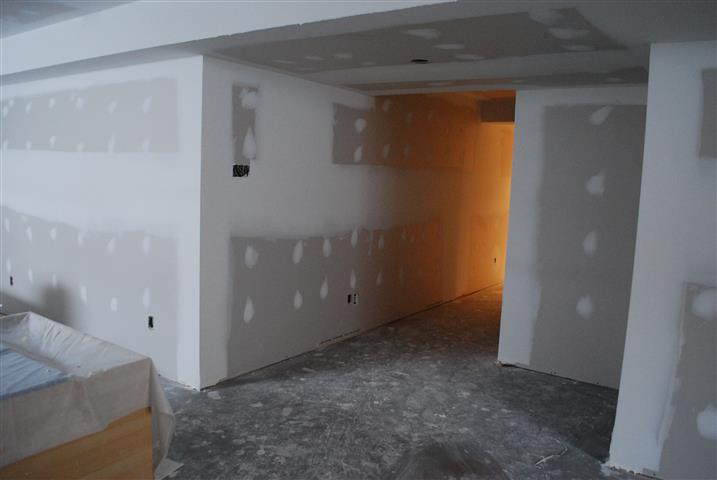
This is of the odd nook that is at the bottom of the stairs, a funny little square space. We had the choice of walling this off to be part of the storage room, or part of the finished room. In the end we chose the finished room because we wanted it to feel more open as you entered the family room area – we were afraid the hallway would feel like a tunnel to other side of the earth, and the family room like a little space pod at tip of a rocket. We’re definitely happy to have the more open feeling, but now we have this nook with no fixed plans for it. Our general idea is to put some sort of shelf here that can serve as game and puzzle storage; but we could also use it as a corner for a big piece of art, or a counter for a microwave and chip bowls, or an extra bookshelf. Ideas?
So, stuff we’ve had to pick out and/or know in advance:
- flooring – so the stairs could be stained to match
- doors – for the two storage rooms, had to pick the door style and all door hardware
- casings and baseboards – had to pick a style
- placement of all outlets, including a special one for the fridge
- placement of all pot lights – giving special attention to how areas will be used
- special light fixture for the hallway – had to go pick this out
- size and shape of the shelves for under the stairs and at the end of the craft area, so they could be boxed around
Whew! And now, I have to go change my socks, because man, freshly sanded drywall is DUSTY. More to come!

Having been through a zillion renos, I’m enjoying these posts in a “ooooh, neat” and “ooooh, glad we’re not doing that” kind of way. You’ll be happy when it’s done, I swear. We spent so much time in Home Depot over the years. I even had a semi breakdown when I went there for bathroom related things. The head contractor sent me to choose fixtures and a mirror so I could write down the #’s for him, and he would go and buy them (eliminate the middle man?). Anyway, I went there and suddenly became so overwhelmed I started crying. I went home, told the contractor I didn’t know what to do for the mirror. He went and got one himself. Moral of the story: crying gets you everywhere with contractors.
Your Ladies’ Poker Room is coming along nicely! 🙂
It looks great and must be so satisfying to see it all coming together. Just think, next you’ll get to do even more shopping to furnish your dining room when you move all the kid stuff out of it.
It’s looking great!!
For the corner. Uh, extra bookshelf OBVIOUSLY. 🙂